API tokens
What is an API token
An API token (APPLICATION_TOKEN) is the secret key your application uses to
authenticate against the BulkGate API. Together with the
Application ID (APPLICATION_ID) it forms the
complete set of access credentials — without both, the API rejects the request.
The token is a random 50-character string made up of digits and lower- and upper-case letters. It is stored encrypted and has no expiry — it stays valid until you regenerate, disable or delete it yourself.
One token is created automatically the moment you create the API. You can add more at any time — one per server or per environment, for instance, so that a single one can be revoked without affecting the others.
Never share the token and never commit it to a public repository. Anyone holding the token and the Application ID can send messages from your account. If you suspect it has leaked, regenerate or delete the token.
Where to find the token
- Click
Modules & APIsin the portal menu - Click the card of your application under
My APIs and Modules - Stay on the
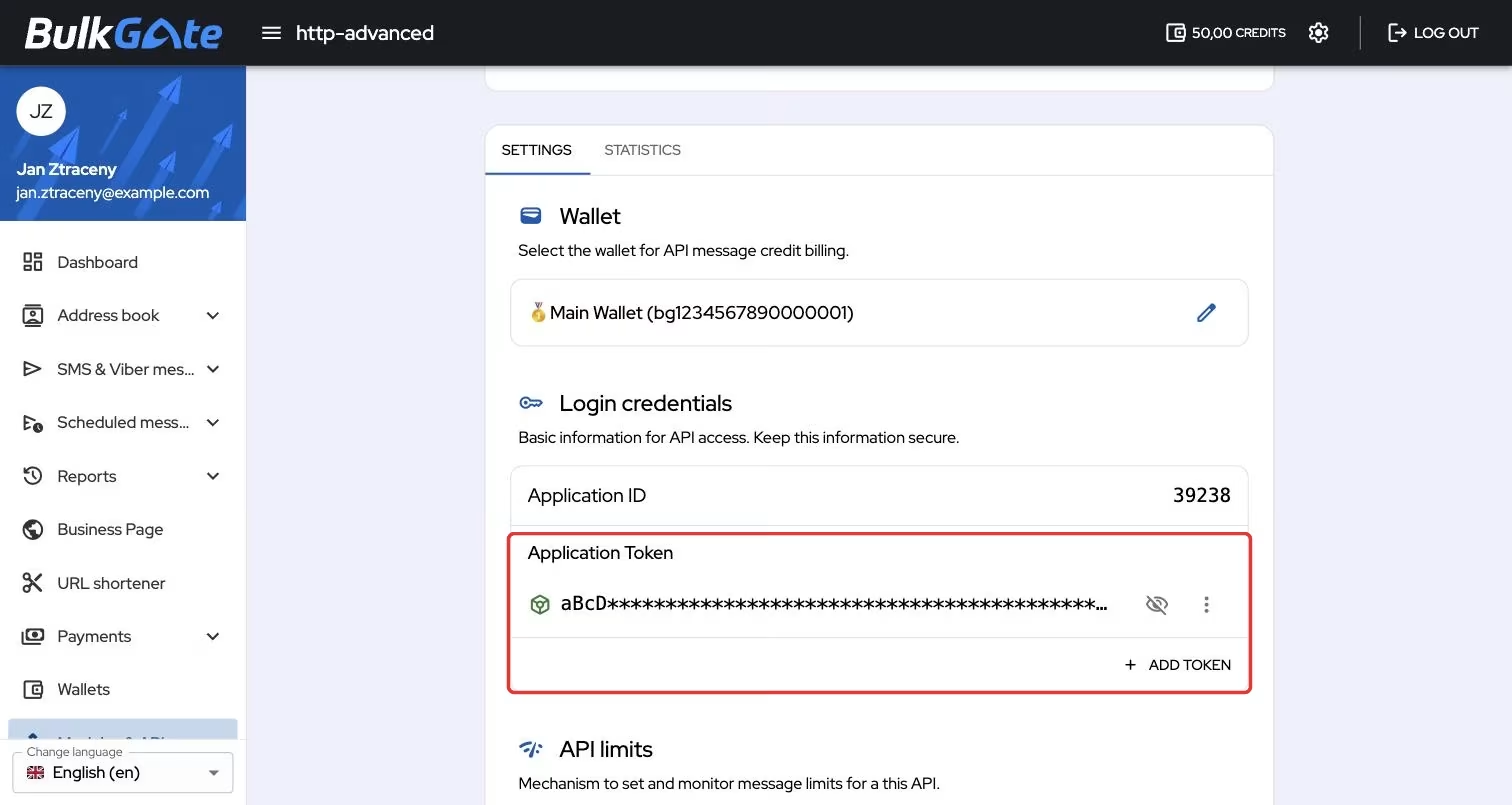
Settingstab and find theLogin credentialssection
It holds the Application ID and, below it under the Application Token
subheading, the list of tokens of that application. A token is never displayed
straight away — you only see its first and last four characters, the rest is
replaced by asterisks.
The icon on the left tells you the state of the token: green means enabled, red means disabled. A disabled token is struck through as well.
The crossed-out eye button on the right of each token reveals it; the remaining
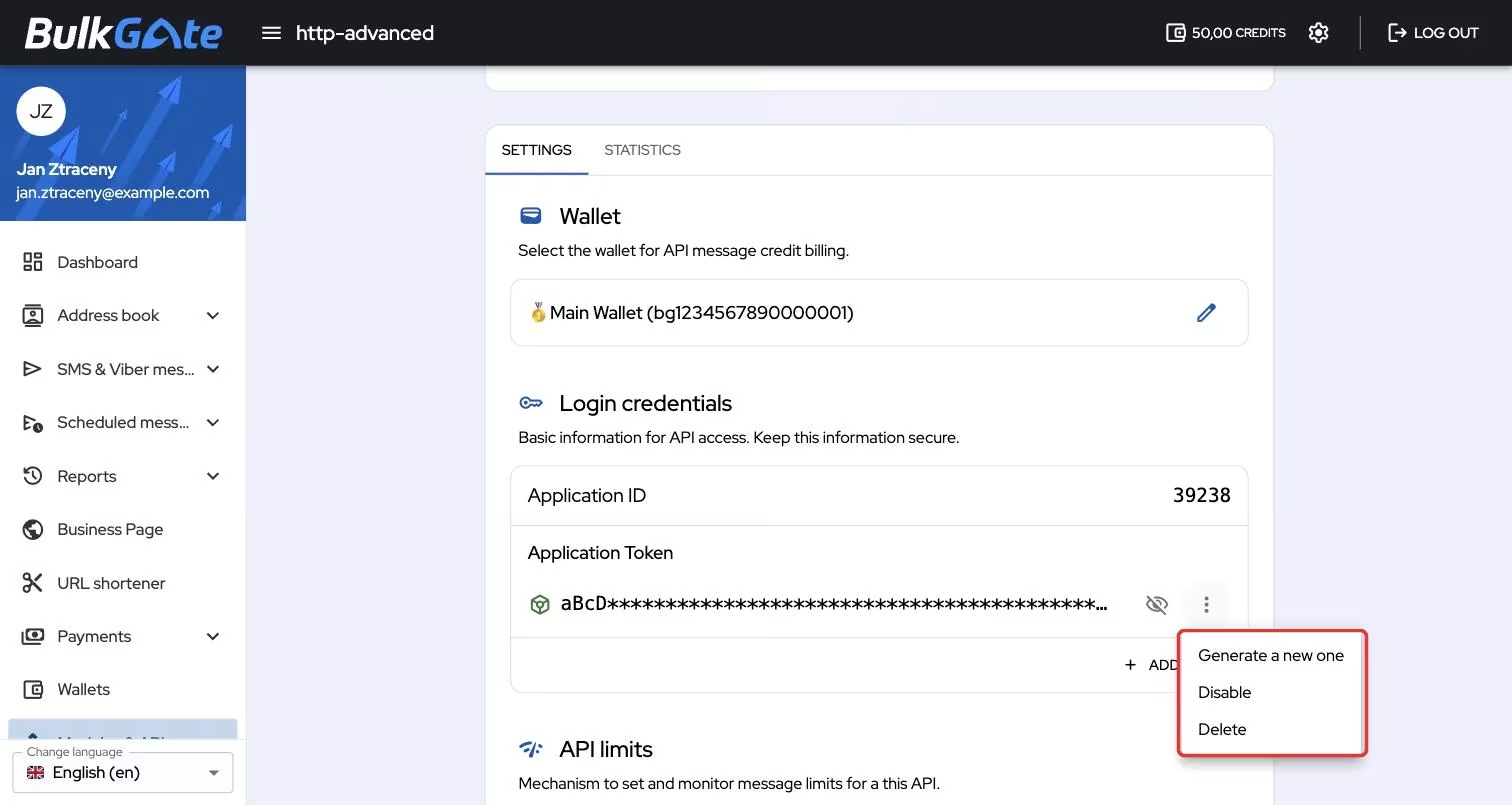
actions are hidden behind the three-dot More actions icon.
How to reveal and copy a token
- Click the crossed-out eye icon next to the token you want to see
- The
Show tokendialog opens, asking you to check your surroundings - Enter your account password and click
Continue - The token is spelled out in full and the icon turns into
Copy, which puts it on the clipboard
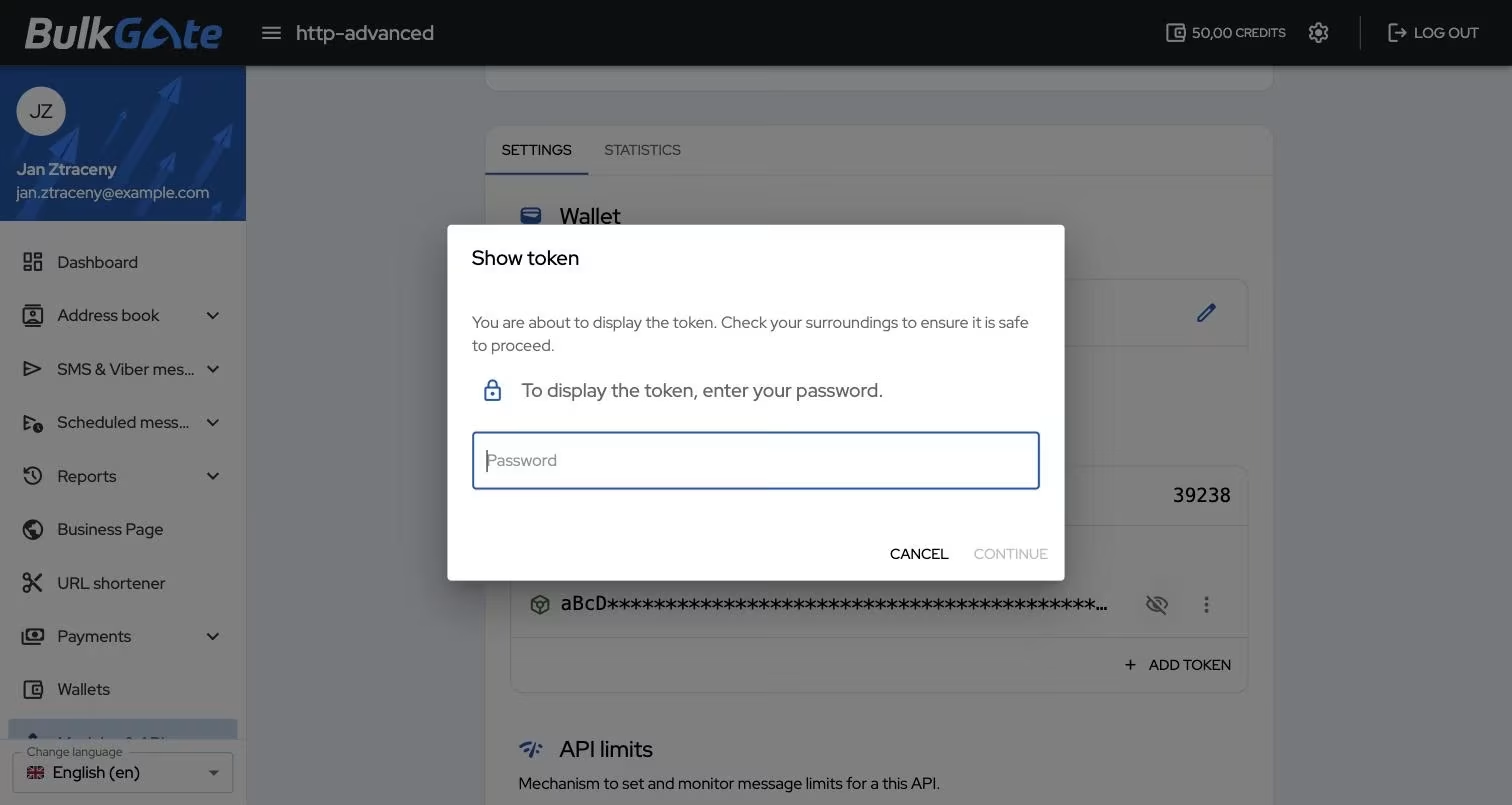
A revealed token stays revealed only until the page is reloaded. After a reload it is masked again and you have to enter your password to see it once more.
How to add another token
- Click
Add tokenat the bottom of theLogin credentialssection - Enter your account password
- Click
Add
The portal confirms with Token has been created and spells the new token out in
full — copy it right away, because it is masked like the others after a reload.
There is no limit on how many tokens one application may have.
How to regenerate a token
Regenerating overwrites the existing token with a new one. It keeps its place in the list, only its value changes.
- Click
More actionsnext to the token and chooseGenerate a new one - Enter your account password
- Click
Generate a new one
The portal confirms with Token has been regenerated.
The old token stops working immediately. Every integration that used it starts getting errors — put the new token in place straight away.
How to disable and re-enable a token
Disabling a token is the reversible alternative to deleting it: the token stays in the list, but it can no longer be used to authenticate.
- Click
More actionsnext to the token - Choose
Disable, orEnablefor a token that is already disabled - Confirm in the dialog that opens
The portal confirms with Token has been disabled or Token was enabled. No
password is required for this action.
How to delete a token
- Click
More actionsnext to the token and chooseDelete - Confirm with
Deletein theDelete tokendialog
The portal confirms with Token has been removed. No password is required for this
action either.
Deletion is permanent — the token cannot be restored or displayed again. If you only want to block access temporarily, use disabling the token instead.
All tokens of an application are also gone the moment you delete the application itself.
How the token is sent to the API
You pass the Application ID and the token as the application_id and
application_token parameters — either in the request body or in the query string.
The other option is to sign a JWT with the token
and send that in a header.
An invalid, disabled or deleted token results in a response with HTTP code 401
and the error type unknown_identity. You get the same response when the
application itself is disabled, or when it has allowed IP addresses configured and
the request comes from somewhere else. The remaining errors are listed on the
API error types page.
How to use the token in a signed JWT
Instead of sending the token with every request, you can sign a JWT with it and send that instead. The token then stays on your side — only the signature derived from it travels over the network.
Put the finished JWT in the Authorization header:
For the API to accept it, the JWT has to look like this:
| Part | Content |
|---|---|
| Header | {"alg":"HS256","typ":"JWT"} — the API accepts no other algorithm or type |
| Payload | application_id holding your Application ID |
| Signature | HMAC-SHA256 of the header and payload, keyed with the API token |
So the payload for application number 39238 looks like this:
When you send a JWT, you no longer need application_id or application_token
among the request parameters — the API takes the identity from the payload.
You can limit the lifetime of an individual JWT with the expire field inside
application_parameters. The value is a Unix timestamp in seconds; once it is
reached, the JWT stops working:
Without this field the JWT is valid for as long as the token that signed it. It is therefore useful wherever you hand the JWT on — you sign it with a short lifetime and the token itself stays with you.
The signature is verified against every enabled token of the application, so you
can sign the JWT with any of them. A disabled or deleted token does not get
through — the same as described above applies: a response with HTTP code 401
and the error type unknown_identity.
Thank you for your feedback.